DIY Remote Downstream Injector Box
Hey, Bill Seith here with Neptune clean, I just wanted to do a quick video on a DIY Remote Downstream Injector Box. It’s been done on the internet a bunch of times, but I wanted to try to improve upon the videos, not the construction.
It’s not my invention, but it is an awesome device, especially if you work alone and you want to turn your down streaming process into a more proficient money-making machine.
This allows you to turn you to pull one hose, hydrate plants before you start and then remotely begin soaping when you’re ready. Then, when it’s time to rinse, you hit the remote off button and you’re ready to rinse again once all the soap is out of your hose.
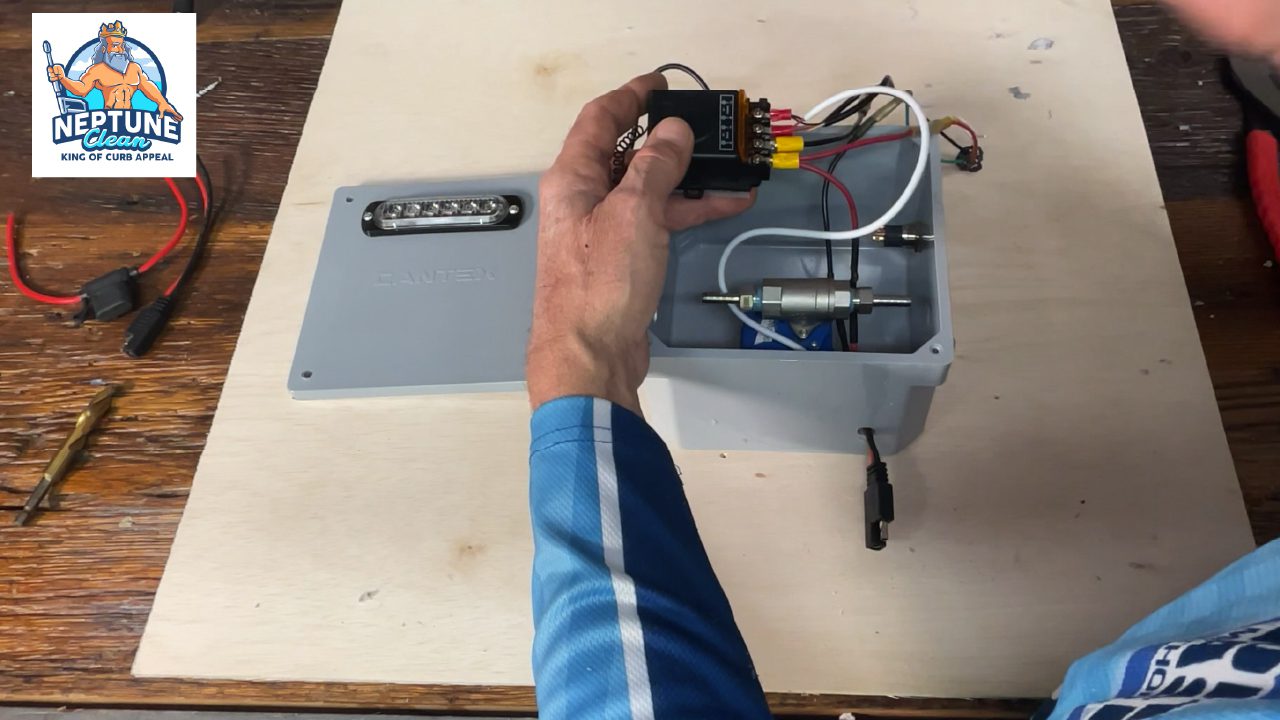
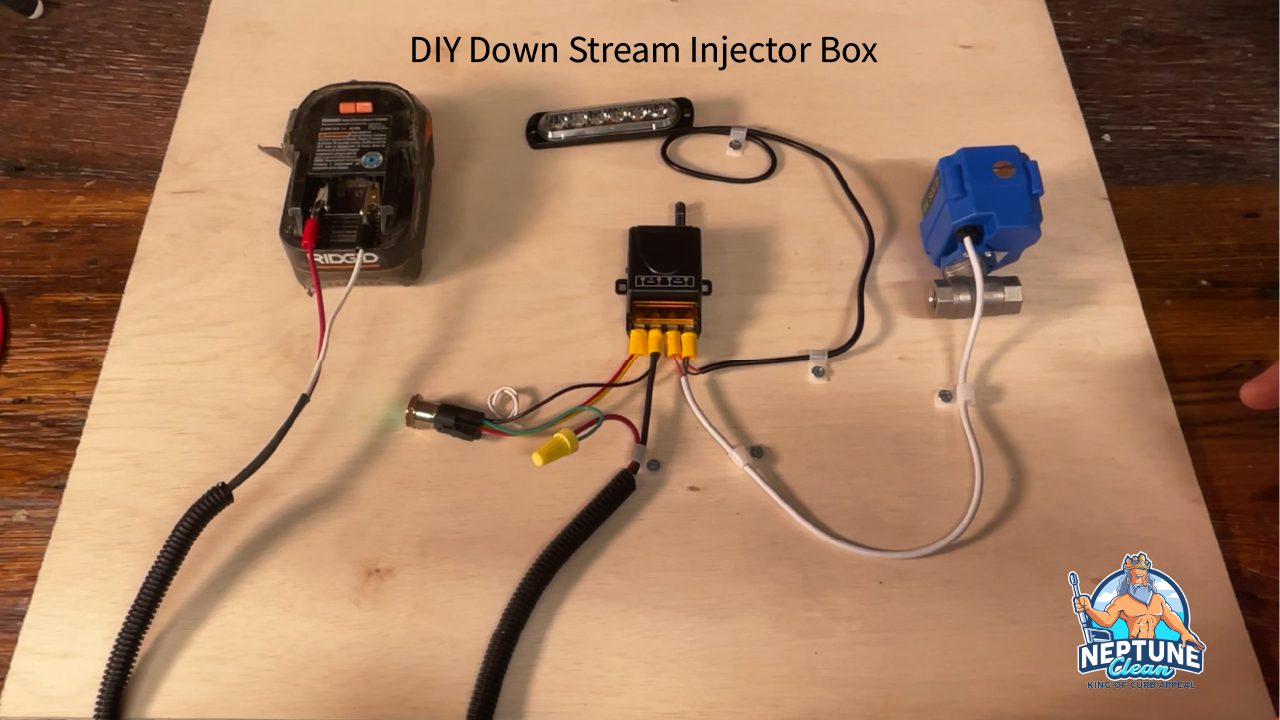
So, I’m in my home garage and I did something I think is cool. I laid the components out on the table and pre-wired everything so you can see how all the components get wired. Once I’m done showing you how it’s wired, I’ll go back and build the DIY Remote Downstream Injector Box.
One of the main problems with some of the videos out there is that the wiring isn’t explained very clearly. This gets confusing so I’m taking all the guesswork out of it by laying out each component, already wired, on a piece of plywood.
Once we go over the wiring, I’ll go ahead and drill the holes and place all the components in the box and show you how I how I put it together. After that, it’s ready to mount on your truck and hook up to your battery.
For this mockup, I’m using a 12V battery from my cordless drill. This system works using a handy dandy remote that communicates with a receiver inside the DIY Remote Downstream Injector Box.
The DIY remote downstream injector box has a receiver which is powered by the battery through the on/off switch. It also sends that power to the strobe light and the motorized ball valve. Once the box is energized by turning on the switch, the on/off function of the motorized soap valve is controlled by the remote switch.
The ball valve is used to allow the soap to flow into the downstream injector when turned on. Turn the remote switch off and the motorized ball valve shuts cutting off the flow of soap.
So, when you hit the button on the remote switch, bam! The strobe light come on, so you have a visual reference from afar that your soap valve is open or on. You never have to walk all the way back to the truck again. Bleach is flowing to your downstream injector.
Hit the off button, strobe light goes off the valve, shuts shutting off the soap. Now you can rinse without have to walk back to the truck.
The way I’ve got this rig set up; the most complicated part is the switch. So, I’m going to start with the outputs, the valve and the light are your outputs. You’ve got a red and a black wire for each one of these components.
You can wire the strobe and valve together, put the blacks on a connector and the red wires together on another connector. You got a positive and a negative output on the receiver. Place the black wires on the negative output and the red wires on the positive outputs. And that’s pretty much it.
Battery side of the DIY Remote Downstream Injector Box
There are five (5) wires coming off the on/off switch. The white wire will not be used in this setup so you can wrap it up to clear it out of the way. The red and yellow wires are combined into one connector and hooked to the positive (input) on the receiver box.
The green from the switch gets connected to the positive side of the battery. Since I’m using a black and red wire combo, the red wire from the battery is spliced to the green from the switch. It is not connected to the receiver unit.
Lastly, strip the black wire from the battery and crimp it to a connector. It will be screwed down to the negative (input side) of the receiver unit.
And that’s it. It’s pretty simple. Next, I’ll go ahead and take this all apart and start drilling some holes in this box. I’ll show you how to put it together in here as well.
Assembling the DIY Remote Downstream Injector Box
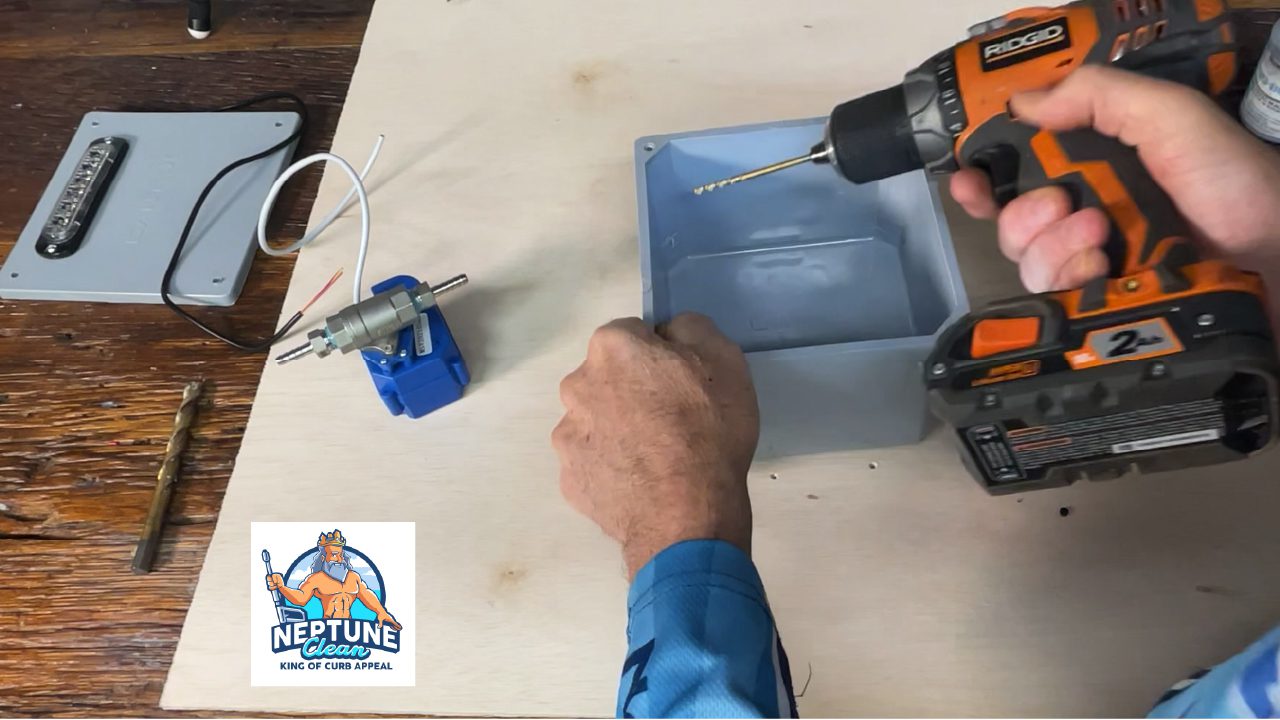
The strobe light for the DIY remote downstream injector box is going to go in the top of the lid. I’m going to center the strobe light on the lid near the top and start drilling some holes. I need three (3) holes. One for the wire and two (2) more for the mounting screws.
The light is about six and three quarters of an inch long. So, I’m going to mark center point on the lid and drill a 3/8-inch hole for the wire. To mark the mounting holes for the screws, I fed the wires through my newly drilled wire hole to use the light as a template. With the light in position, I can mark the holes.
Next, I’ll remove the light, drill the holes for the screws and then assemble the light to the lid of the DIY Remote Downstream Injector Box. Don’t forget feed the gasket through the wire before mounting the light.
Now that the strobe light is mounted to the lid, I can strip this wire to prepare it for the next step.
Preparing the motorized ball valve for Installation.
Before I can mark the holes for the motorized ball valve, I need to install the 1/4-inch barbed fittings. I like to use the True-blue Pipe dope. I think it’s the best stuff for non-pressurized fittings so obviously, you can’t use this on your pressure washer fittings.
Once you apply the pipe sealer to the fittings, screw them into the ball valve and cinch it down just slightly tighter than hand tight using a wrench.
Now I can use the valve assembly to mark the holes for the hoses. Once I place the valve inside DIY Remote Downstream Injector Box just slide it over and put a mark on the box where it hits.
You can also apply some paint or ink to the end of the barbed fitting and slide it over to touch the box. It should make a mark where you need to drill the holes. Do that for each side and you’re ready to drill the two holes for the input and output holes for the soap.
I use a reinforced quarter inch inside diameter hose. The outside diameter of the hose is ½ inch. You can drill a ½” hole and feed the hose through or you can drill a larger hole if you intend to install a grommet. The grommet obviously must have a ½ inch inside diameter for the hose so the hole size will need to be slightly larger based on the thickness of your grommet.
I just had to put them in later. But you know. Let’s see, so in the next hole, I got a drill is for the switch, and so the way that my truck is laid out, I want to put I want to put this switch on on the on this side here.
I need two more holes to finish off the box. One for the on/off switch and one for the battery wires. I’m now ready to assemble the DIY Remote Downstream Injector Box.
Installing the on/off switch is easy. Make sure the gasket or o-ring is in place, feed the switch through the hole in the box and screw the nut from the back to hold it in place. Hand tight should be enough to hold it in place.
Paring the Strobe Light and Motorized Ball Valve to the DIY Remote Downstream Injector Box
The worst thing about paring the strobe wires to the motorized ball valve wires in the DIY remote downstream injector box are the tiny gauge of the wires. The red and black wires are so small that you must use great care when stripping the sheathing from the wire. Be careful to strip only the sheathing and not cut the wire itself.
Once you have the stripped, the red from the strobe and the red from the valve are twisted together and crimped to the wire terminal. The same thing goes for the black from the storb and the black from the valve.
Now you can connect them to the receiver. The black wire terminal is connected to the negative (output) side and the red wire terminal is connected to the positive (output) side of the receiver.
Now it’s time to secure the motorized ball valve inside the box. I’m using Velcro tape to hold it in place. This way I can remove it easily if repairs are ever needed.

Completing the DIY Remote Downstream Injector Box Wiring
Before I commit to installing the receiver into the box, it’s time to connect the input side of the switch. The input side of the receiver has two connections as well. A positive side and a negative side.
The black wire from the battery connects to the negative (input) side and the red and yellow wires from the switch are connected to the positive (input) side of the receiver. I’m using a pigtail connector from the battery to ensure the box is easily removed without having to cut the wires.
It’s a quick disconnect. You can pull the whole box off if you need to work on it and then be able to connect it back up again. I’m also installing an inline fuse to protect the whole system.
Lastly, don’t forget the green wire from the switch connects to the red (positive) wire from the battery. That’s about it, now you can connect everything to the receiver and then install the receiver into the box.
Now you can put the gasket on the box cover and install the cover on the box. I’m done, except for, hooking up the actual hoses on the truck and then connecting the battery and it’ll be ready to go.
Cost of building a DIY Remote Downstream Injector Box Versus Purchasing Pre-Built Unit
In the end I spent around $130 dollars to build this unit which is about 75% cheaper than purchasing a pre-built unit. Check out this link to see the cost of a Pre-Built Downstream Injector Box.
Click this link for more information on running your own pressure washing company.


Do you have a parts list and where to buy? Please
I created a parts list in the description area of the YouTube Video. See this link: https://youtu.be/0HTCGbMWMFw
Was thinking of running multiple soaps…
We mainly focus on truck washing and would like to have
1. presoak
2. Soap
3. Wax
4. Degreaser etc..
would you just add more valves to the unit?
Hey Mario,
If you’re looking to add more soaps I think you’ll have to build a manifold with a valve for each soap tank. I don’t think an automated system is what you’re looking for. These are really for folks who might find themselves 300′ from their truck washing a large house or commercial building. Check out this post and video: https://www.neptuneclean.com/building-my-soft-wash-blend-manifold/
Mainly do truck washing but also do pressure cleaning when asked.
Want the remote system to swap soaps and then rise when done etc.
As most trucks are 200-300ft from the van
Was thinking a valve on each chemical and then use a 4 into 1 barb manifold to the injector.
Hey Mario,
The only problem is that you’d need a separate system for each soap type. The remote actuator is only on/off and it’s connected to your motorized ball valve. You’d need 4 actuators, 4 automated ball valves which would also give you 4 separate remotes to operate. You can’t use a three-way valve because then you’d be switching between soaps and not turning them off when you want to rinse. I guess it could be done as long as the remotes were working on different frequencies. Maybe there’s another actuator that controls 4 devices. The remote would have all for buttons on it and would probably be more expensive but I’m sure someone makes it. After a quick search, I found this on Amazon: eMylo DC 12V 6X 1 Channel Wireless Relay RF Relay Wireless Remote Control Switch 433Mhz Transmitter with Receiver. It’s a six channel relay so it should operate 6 different devices.
Bill